Is it just me or is it baby time in a major way! Everyone I know is pregnant or just welcomed their first little one into the world. I guess its just that time in my life and I have to admit I love it!
A few months ago I posted on some quilt research I was doing. It was all in preparation for the embroidered baby quilt we were planning for our amazing friends Rachael & Brocket. Jessica proposed reviving an old family tradition in which the ladies of the group hand embroidered individual squares that would be combined into a larger baby quilt. So, the gauntlet was thrown down and we went about tackling it. Honestly, the organization of 6 ladies was probably the hardest part of all. Below is the process and the final result! If we can do it, so can you!
We gathered embroidery patterns from our local favorite Sublime Stitching, and a few from online, pulled together fabric scraps, and some wine and we were off.
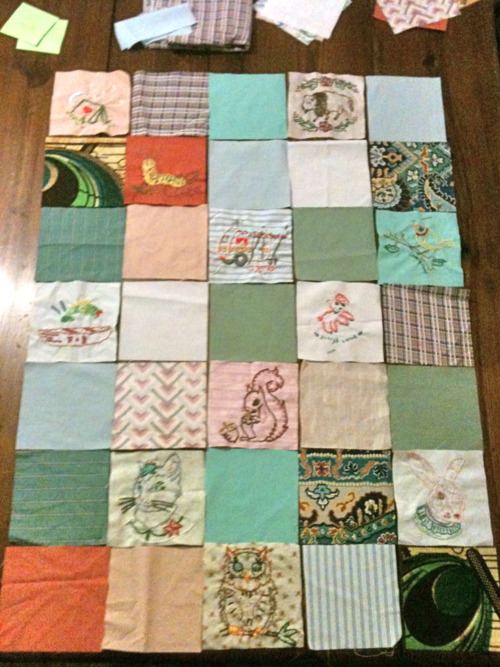
After a few more wine, cheese, and embroidery sessions, I got all of the squares from each lady and it was now my turn to organize the fabric, cut perfect 5 1/2″ by 5 1/2″ squares, and create the layout. I have to give some thanks to Grandma for giving me her old quilting supplies with the super useful rotary cutter and board. Without it, I would not have been able to cut the squares.
With all of our crazy patterns and colors it wasnt easy to make the composition flow, keep the colors balanced and a theme present, but after a few hours, I think I got it right.
I was originally going to use the quilt as you go method, but then realized you couldn’t do it with squares! So, I sewed all of the squares together with a 1/4″ seem allowance on each side, pressing flat with an iron as I went. The end result was each exposed square front was 5’x5′ square. I then attached a 5″ white border around the entire embroidered section creating a piece that was 35″x 45″. At this point, I handed the quilt of to Jessica to do the actual quilting and border.
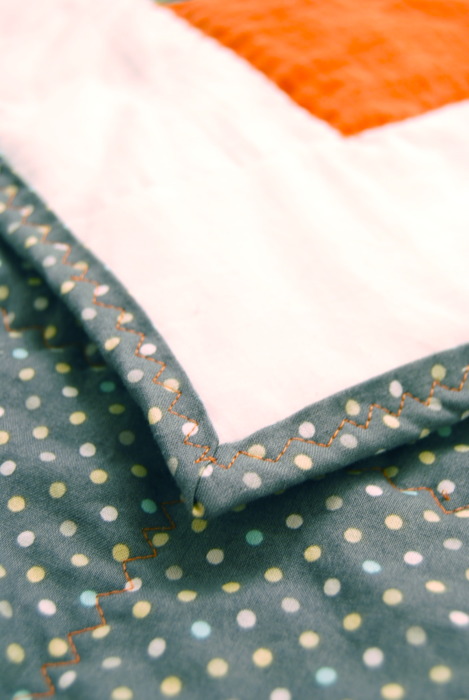
Jess and I picked out a neutral and slightly modern grey from another local favorite and neighbor, Stitch Lab. The quilt was looking a little too granny chic, and we wanted to ground it and tie the look together while also allowing it to blend in with the final decor of Rachael and Brockets nursery. We decided to use a reddish-pink accent thread to bring in the cranberry and pink already present in the nursery and also prominent in some of the embroidery.
To begin quilting, we layered the front, batting, and backing and headed to the sewing machine. We chose a large multi-stitch zig-zag to go over all of the seams and bind the three layers together. We chose a zig-zag to reinforce the seams of each embroidered square so there would be less wear and possible tearing at the seam later.
At this point, you need to proceed slowly, making sure you arent puckering your fabric on the back, keeping everything smooth and even. There were a few thread pulling sessions but eventually Jess got it all quilted.
Next came edging. I sent Jess this video, also by Missour Start Quilt Company, and apparently it was a great help. The edging came out beautifully. The quilt was finally finished, slightly imperfect, but made with much love and excitement!
We gave the quilt to Rachael at her shower {featured here} and she loved it! I am also happy to announce that Rachael and Brocket welcomed Elouise Clementine Hamilton into the world on Monday October 17th. Her fairy godmothers were so excited to finally meet her!
Filed under: diy


Comments (0)
Back to forge