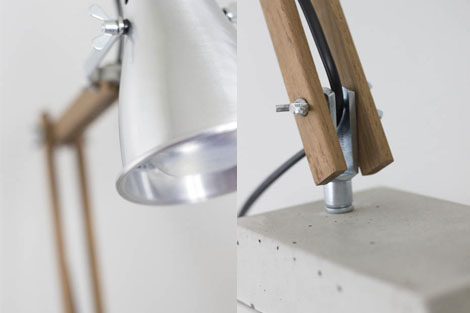
I stumbled across this DIY of a concrete base bedside lamp from nimi design, and fell in love. Now that we are pretty much finished with the renovation of our house, I finally get to focus on the fun things and little touches here and there. A new bedside lamp is on the agenda and this one would be a perfect addition. I have pulled the how-to images, instructions, and materials lists from nimi’s site. The metal shades came from Ikea, but the remainder of the supplies are from the hardware store. Although these measurements are metric, I feel confident that as long as you know what pieces correspond to each other, you will be able to modify the materials you need to. To get even more step by step, you can see all 4 of nimi’s posts, with every possible detail, here.
Now all I need is the time to make one!
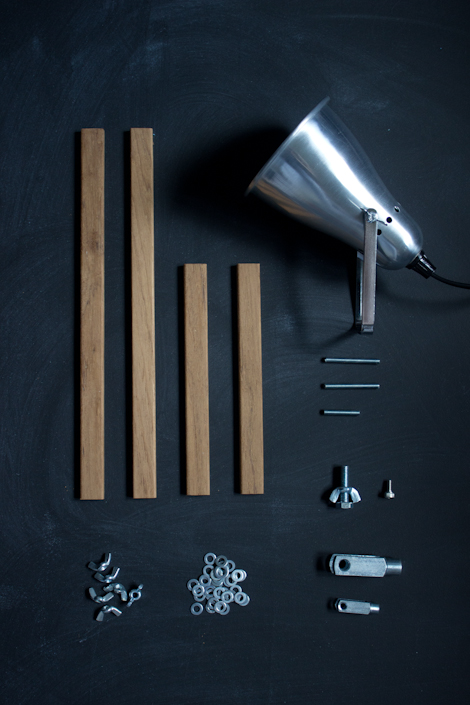
- 1 meter of teak batten strip (cut into two 19 cm long pieces and two 31 cm long pieces)
- 1 Ikea Fas lamp
- 2 threaded rod pieces, 5 mm thick, 4,5 cm long
- 1 threaded rod piece, 5 mm thick, 3 cm long
- 1 M8 bolt (with a matching wing nut for stability in the concrete)
- 1 M5 screw, 10 mm long (corresponding with the M5 fork joint)
- 6 wing nuts, M5
- washers
- 1 M8 fork joint
- 1 M5 fork joint
- Ikea Antonius insert basket (or any plastic item that can be used as a mold for the base)
- Reusable adhesive putty
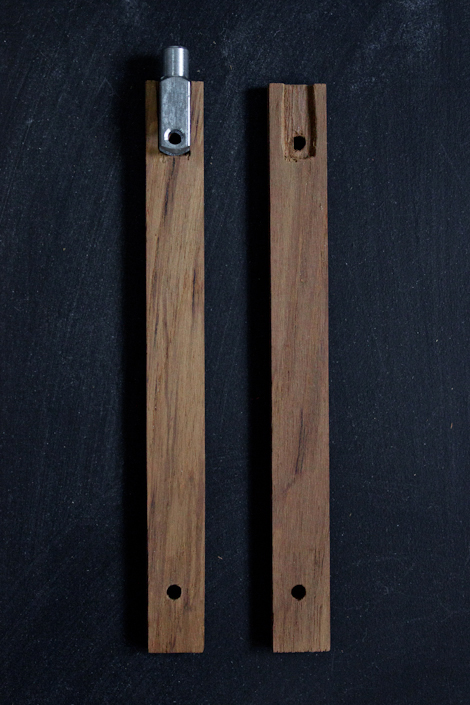
Drill six 5 mm wide holes, 20mm and 35mm away from the ends according to the diagram above
Take the remaining un-drilled end of the 19cm pieces, carve a notch to hold the smaller M5 fork joint at each end, and then drill the corresponding hole where indicated by the fork joint.
Now its time to attach the parts! Each joint gets a threaded piece, with a washer and a wing nut on each side to finish it off. The lamp shade is attached to the fork joint with the corresponding M5 screw. Keep in mid you will want to thread your light cord back and forth through the parts which needs to be done during the assembly process.
Now the base! Drill a hole in the bottom of your mold to allow for the M8 bolt to be partially submerged in the concrete and seal around the bolt with your reusable putty. Nimi has some tips on working with concrete here.
Once they are dry, pop them out and apply felt to the bottom so they wont scratch up your table top. The mold on the right in the picture above has the M8 fork joint attached to the protruding screw. And that is it! I cant wait to try my own.
Filed under: diy


Comments (0)
Back to forge